How to Convert a Video to H.264 on iPhone with a Shortcut
Screeny, like many other apps, encodes video in HEVC (H.265) by default, while some other apps expect the older H.264 codec. This guide shows how to re-encode a video directly on your iPhone with the Shortcuts app.
Why Screeny exports HEVC
HEVC is what iPhones record and export by default, and there are good reasons for that. It compresses about twice as efficiently as H.264, so the same video at the same quality is roughly half the size. Apple devices decode it in hardware, so it plays and exports quickly without draining the battery.
Why some apps still want H.264
H.264 is older, and it is supported everywhere. That is exactly why some pipelines still ask for it:
- Scheduling tools like Buffer publish through each social network’s API, which has stricter rules than posting from the network’s own app.
- App Store Connect only accepts app previews as H.264 or ProRes 422 HQ, so an HEVC file won’t upload.
- Older editors and Windows machines may not have an HEVC decoder installed.
Screeny’s exports already use a constant frame rate, so the codec is the only thing to change.
Build the shortcut
Screeny doesn’t offer an H.264 export option, to keep the app simple, but Apple’s Shortcuts app can do the conversion. Open Shortcuts, create a new shortcut (we named ours “Convert Video to h.264”), and add three actions:
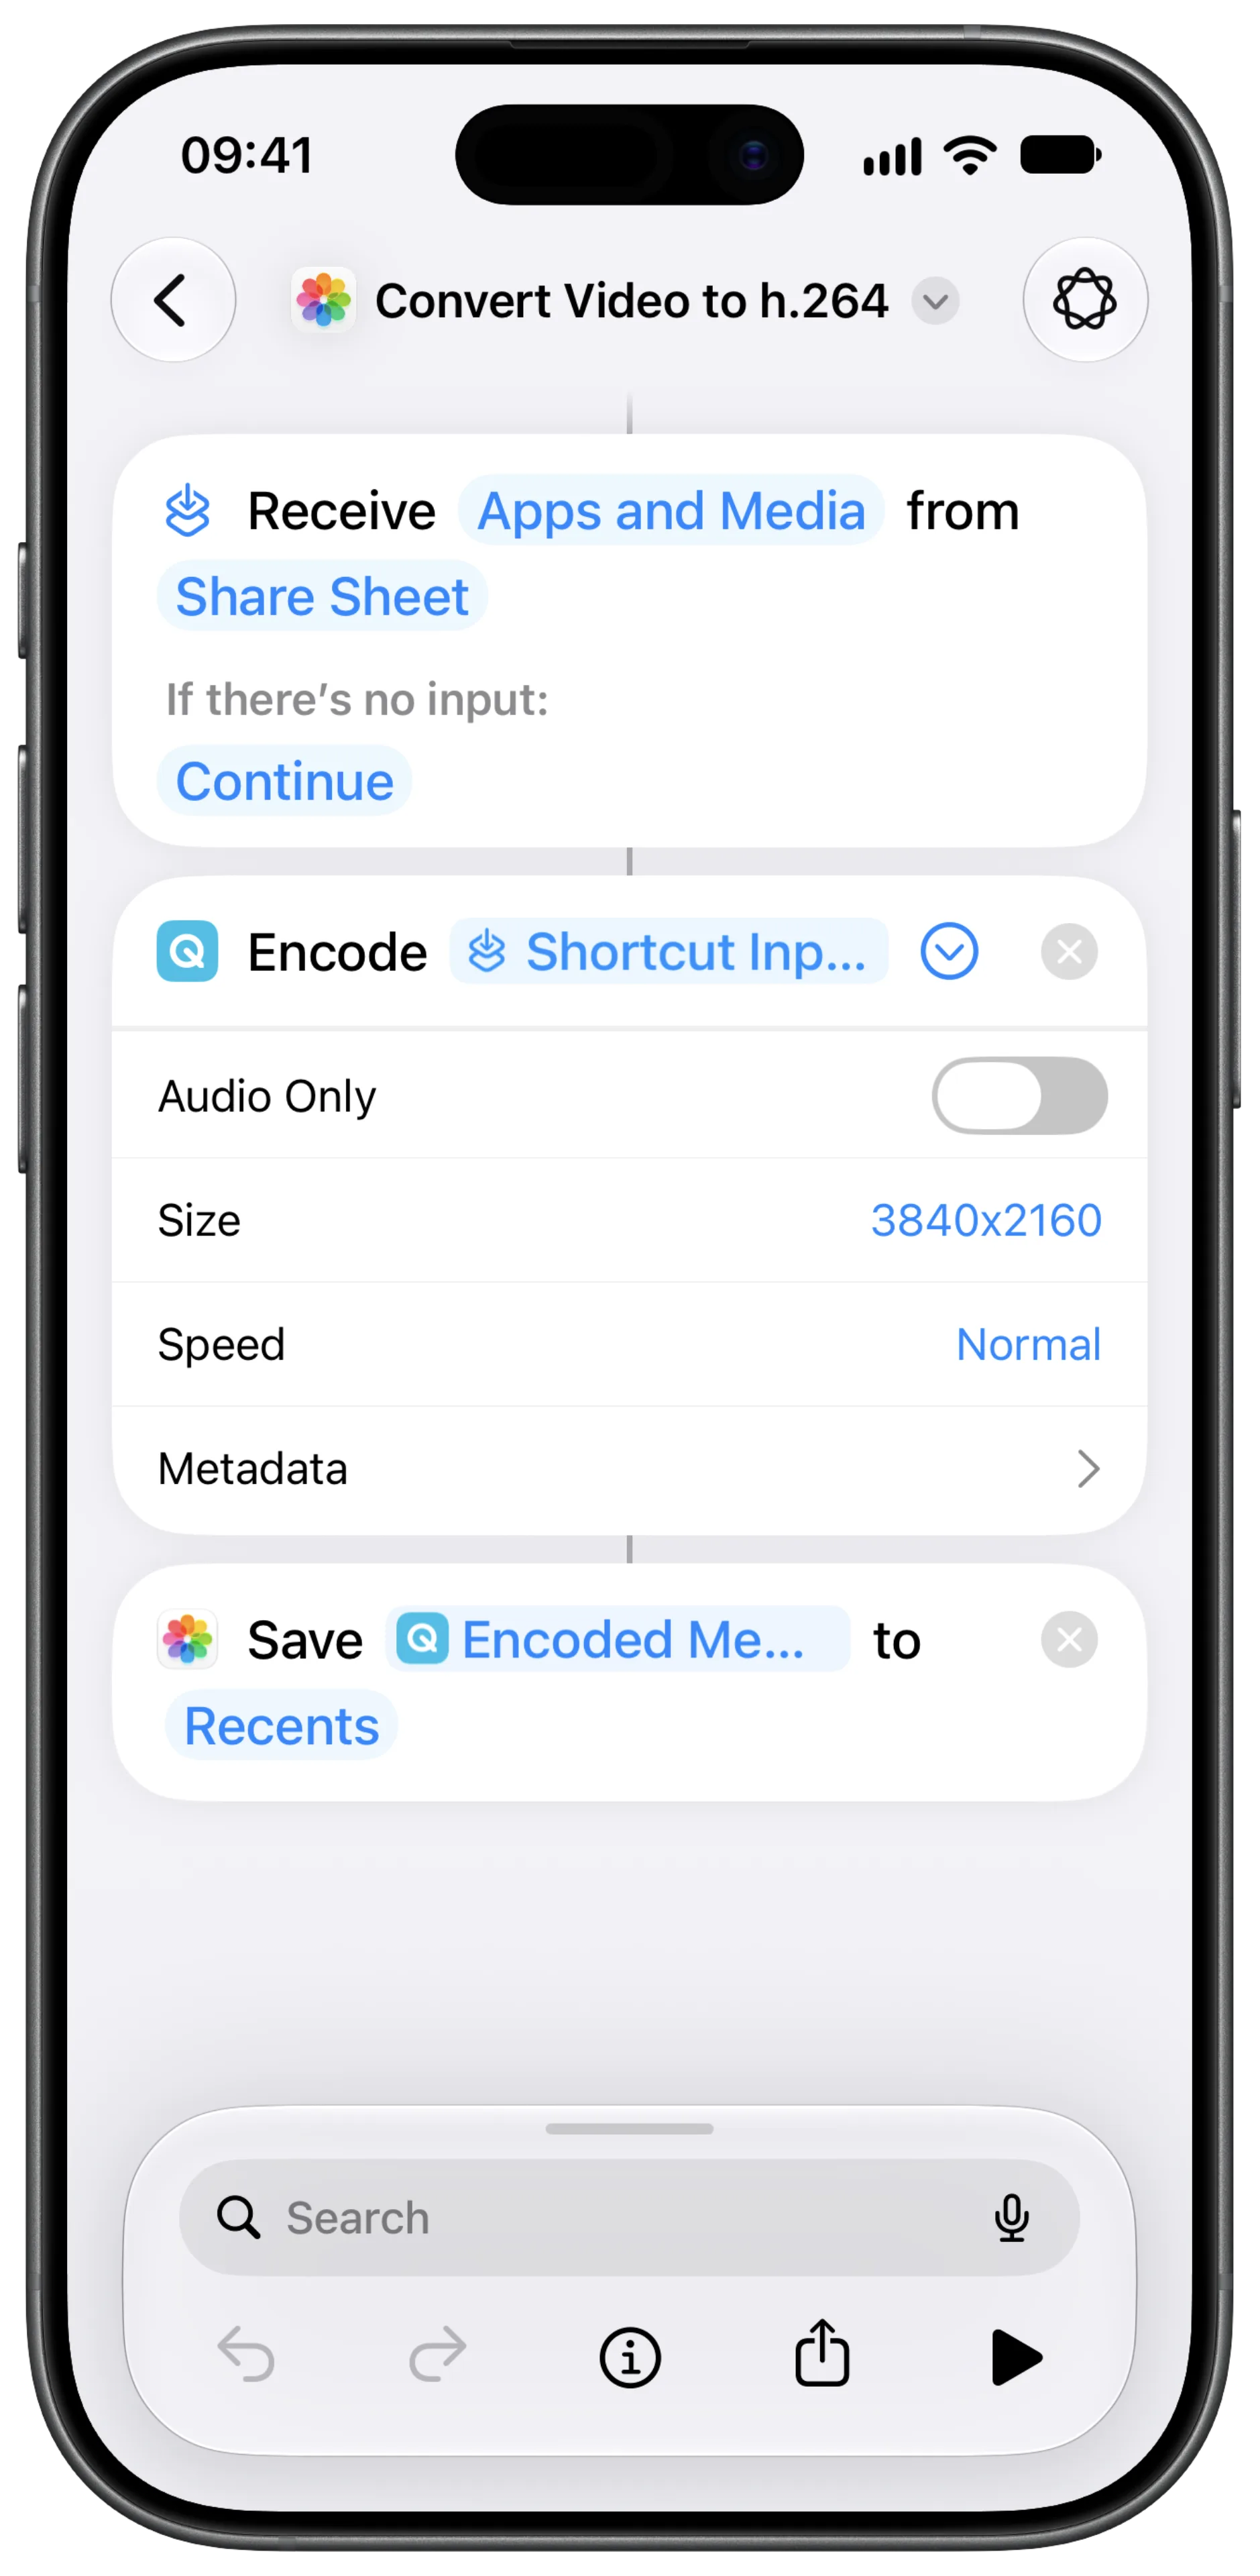
- Select Photos. Tap the arrow and set Include to Videos, so the picker only shows videos.
- Encode Media. Tap the arrow to show the options and set Size to the largest value, 3840×2160. Leave Audio Only off.
- Save to Photo Album. It saves the encoded video to Recents.
The size is a maximum, not a target: a video is only scaled down if it doesn’t fit inside it. At 3840×2160, a 1920×1920 Screeny export keeps its full resolution.
- Turn on Show in Share Sheet, then delete Select Photos. Tap the (i) button at the bottom of the editor and switch on Show in Share Sheet. Shortcuts adds a “Receive Apps and Media from Share Sheet” action at the top on its own. You can now delete the Select Photos action: the video will be passed in directly from the share sheet. Check that Encode now takes Shortcut Input.
Put it in your share sheet
Now make it reachable from anywhere you share a video, including Screeny’s export screen:
- Export a video from Screeny and open the share sheet.
- Scroll all the way down and tap Edit Actions.
- Find your shortcut under Other Actions and tap the green + to add it to Favorites.
From then on, the shortcut sits in the top row of the share sheet. Tap it and the conversion runs in the background, with the Shortcuts icon showing in the status bar while it works. The H.264 copy lands in your photo library, ready to upload.
Frequently asked questions
Does converting to H.264 lose quality? Every encode is lossy, but one encode at full resolution on your phone is a lot better than an unknown transcode on someone else’s server. Expect the H.264 file to be larger than the HEVC one: that’s the efficiency difference, not extra detail.
Can I convert a transparent MOV? H.264 has no alpha channel, so the transparency is lost. For social media that doesn’t matter, since no network supports transparent video anyway. Export an MP4 with a background for posting, and keep the transparent MOV for editors like Final Cut or Keynote.
Is there a faster way on a Mac? Yes. Right-click the video in Finder, choose Quick Actions → Encode Selected Video Files, then choose the largest setting with HEVC left unticked.